The rules that hold
- Where Clarida decides, it says why. Left on automatic, the plate layout shows the reason under each rule it picked.
- A well you change stays as you left it. After a change by hand the layout stays manual, and Clarida warns before it lays the plate out again.
- What the bench used is locked. Once the runs are marked ready, the layout and the mixes lock, so the record can’t drift from what was pipetted.
In this step
01In the app: Sample Prep
Samples from a spreadsheet, a file or your library
Paste your samples from a spreadsheet, read them from a file or a sheet of your notebook, take them from your library, and create the rest: a batch at once, a dilution series of standards from a starting quantity and a factor, one by one. Any extra column you paste becomes a property to group and test by later, such as treatment, time point or donor.
- Sample types: unknown, standard, the negative controls (NTC, NAC, no-RT, NTP and a generic one), positive control, optical calibrator
- Per control: the Cq range you accept
- Properties: text, list, number, date, yes/no
Read the method: Importing samples and assays
02In the app: Assay Prep
Assays, single or multiplex
Add assays the same ways, take a whole panel from your library, or generate up to 1,000 at once. A multiplex assay holds up to six targets, each with its dye and type; pasted rows sharing a name become one, shown to you before it is created.
- Assay types: gene of interest, reference gene, positive control, negative control, internal amplification control
- Dyes: SYBR, FAM, VIC, HEX, ROX, Cy5, Cy5.5, TAMRA and Texas Red
- Targets per assay: one to six
03In the app: Marker Setup
Genotyping markers, derived from your assays
For a genotyping experiment, each marker says how its alleles are told apart, and which target or dye carries which. Take markers from your library (the default), derive them from your assays and tidy their names, or enter them by hand, with the locus.
- Calling method per marker: ΔCq, end point or melting temperature
- Expected genotypes: per marker, for each control sample
Read the method: Genotyping by allelic discrimination
04In the app: Mix
The mix, and how you pipette it
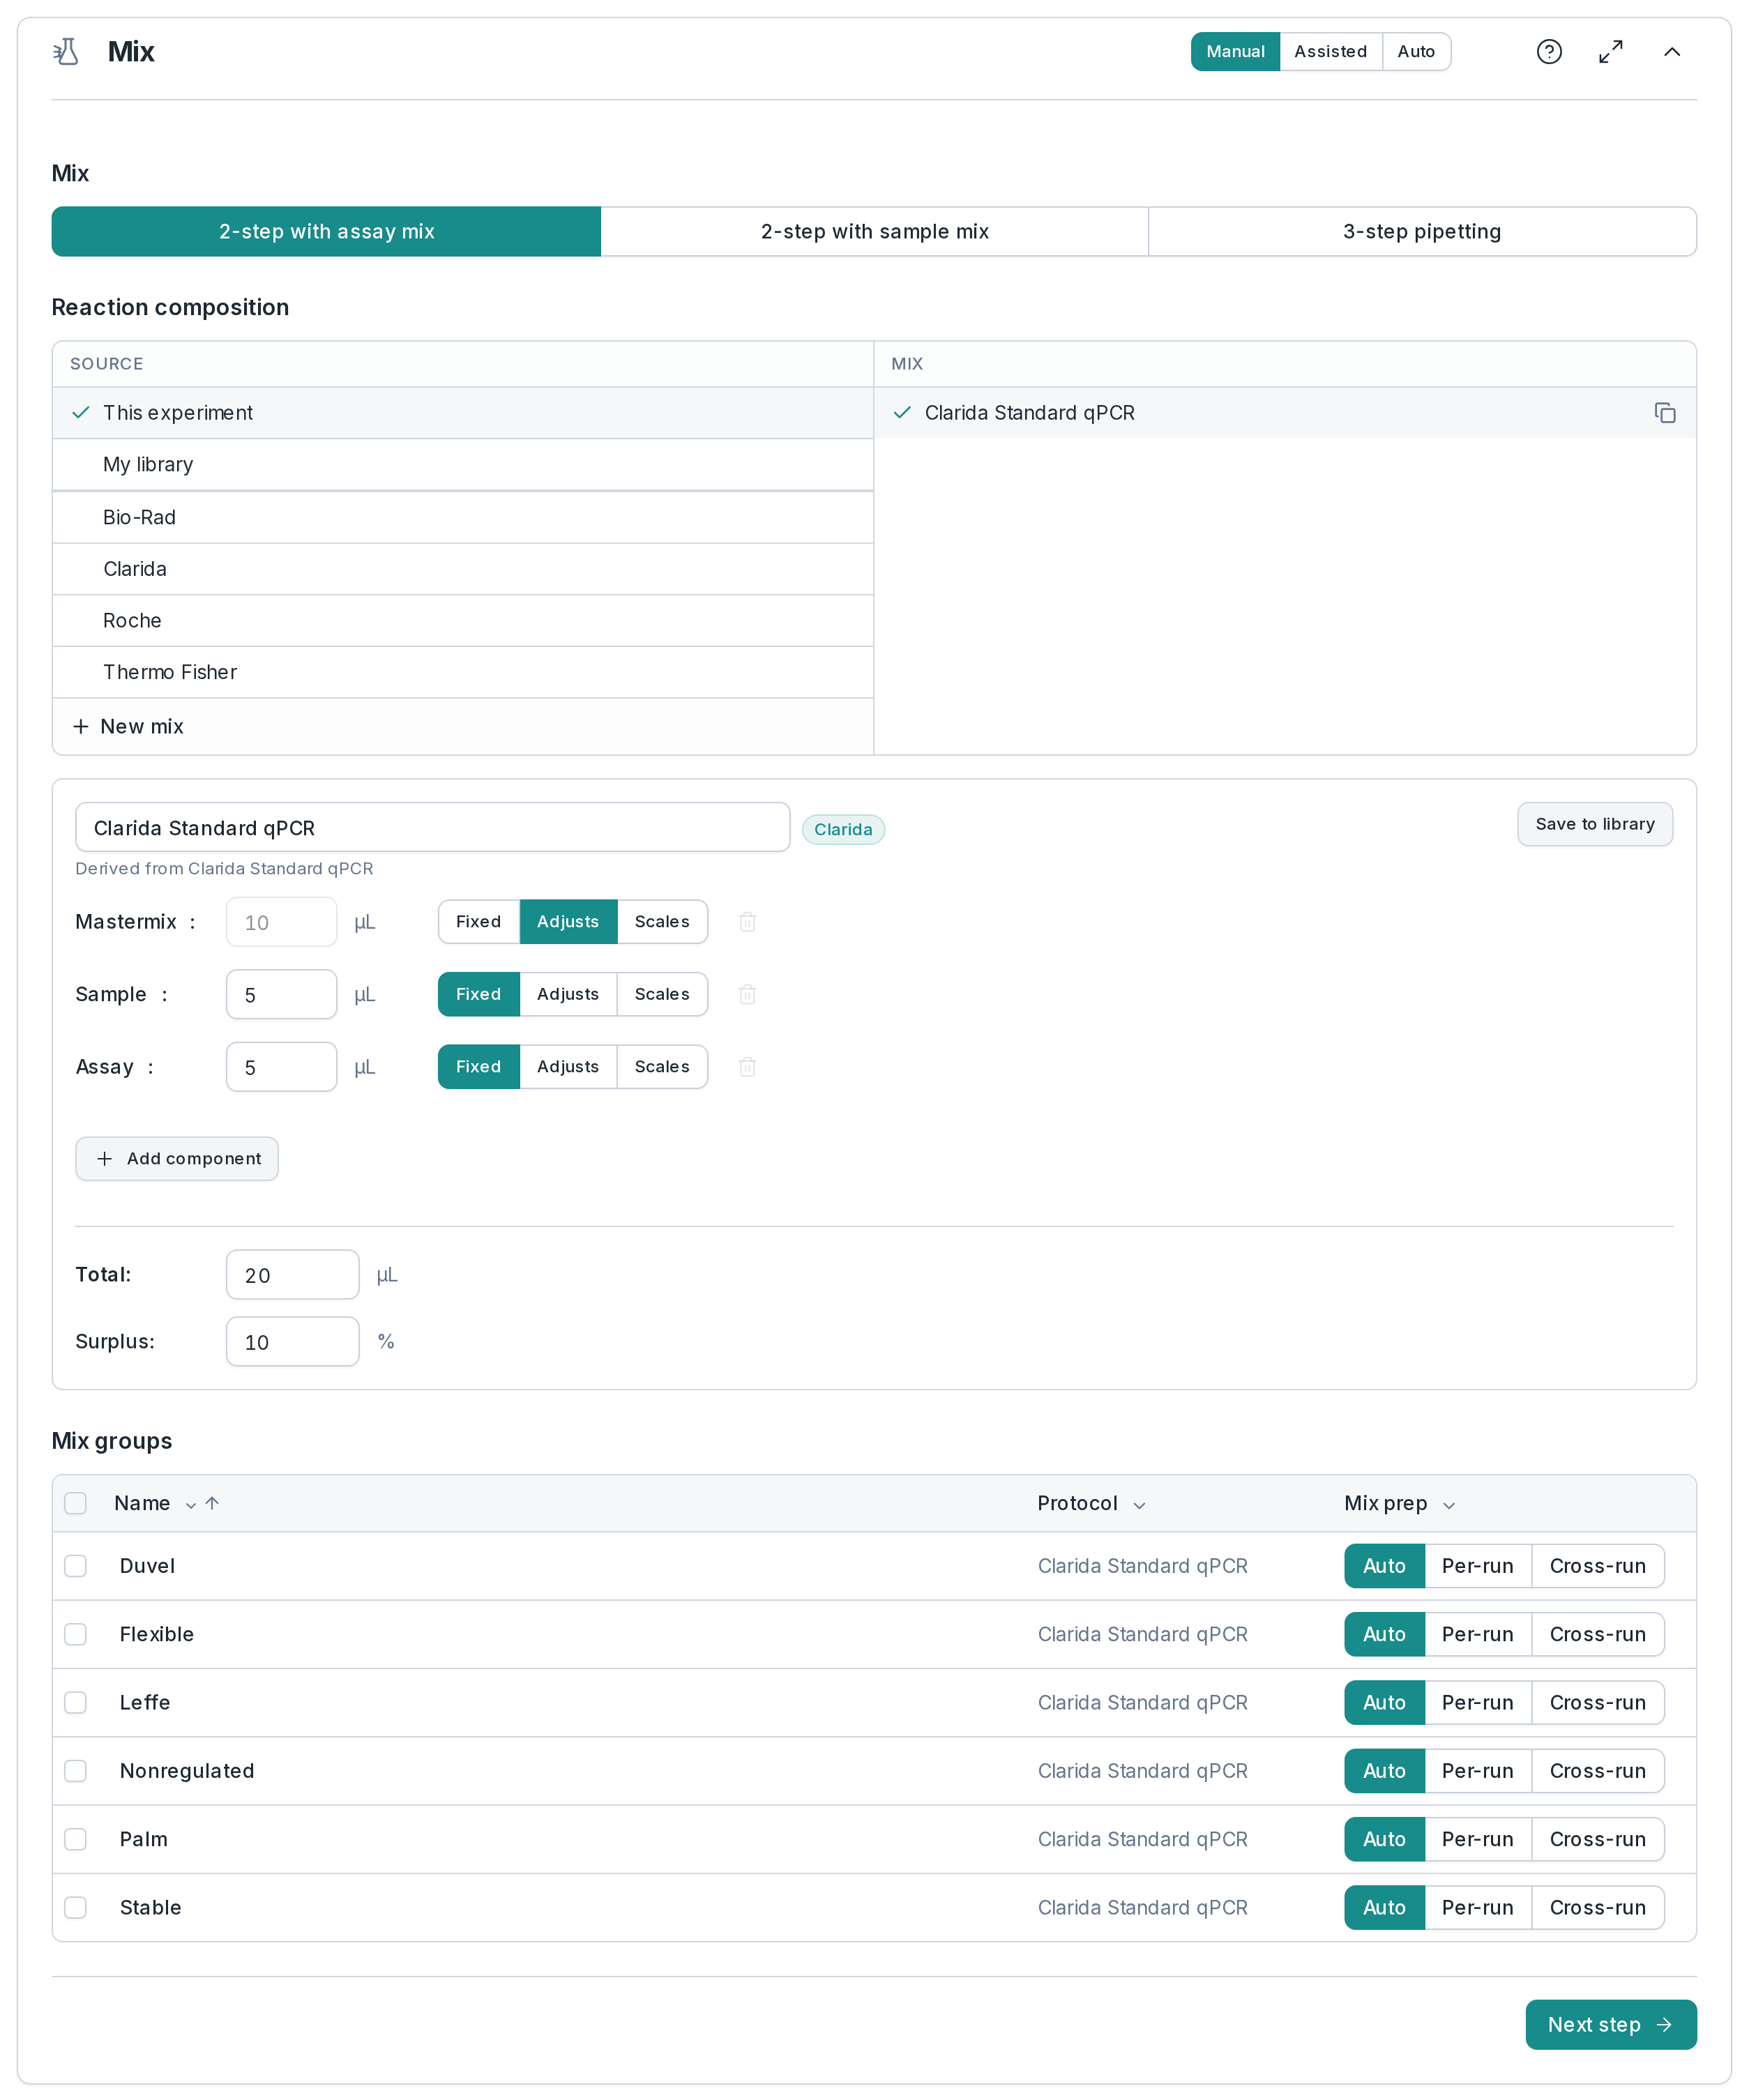
Take the reaction mix from this experiment, your library or the commercial list Clarida keeps by company. Or write the recipe yourself. How you pipette, with an assay mix, a sample mix or in three steps, decides how the plate is blocked and the volumes split. The surplus set here, 10% unless you change it, is carried into every amount at the bench.
- Mode: automatic, assisted or manual
- Pipetting approach: 2-step with assay mix, 2-step with sample mix, or 3-step pipetting
- Recipe: each component fixed, adjusting or scaling with the reaction
- Units: µL, % or ×, with the total and the surplus
- Mix strategy: per run, shared across runs, or chosen automatically
- Save: a mix you made to your library
05In the app: Run Layout
The plate laid out the way your lab pipettes
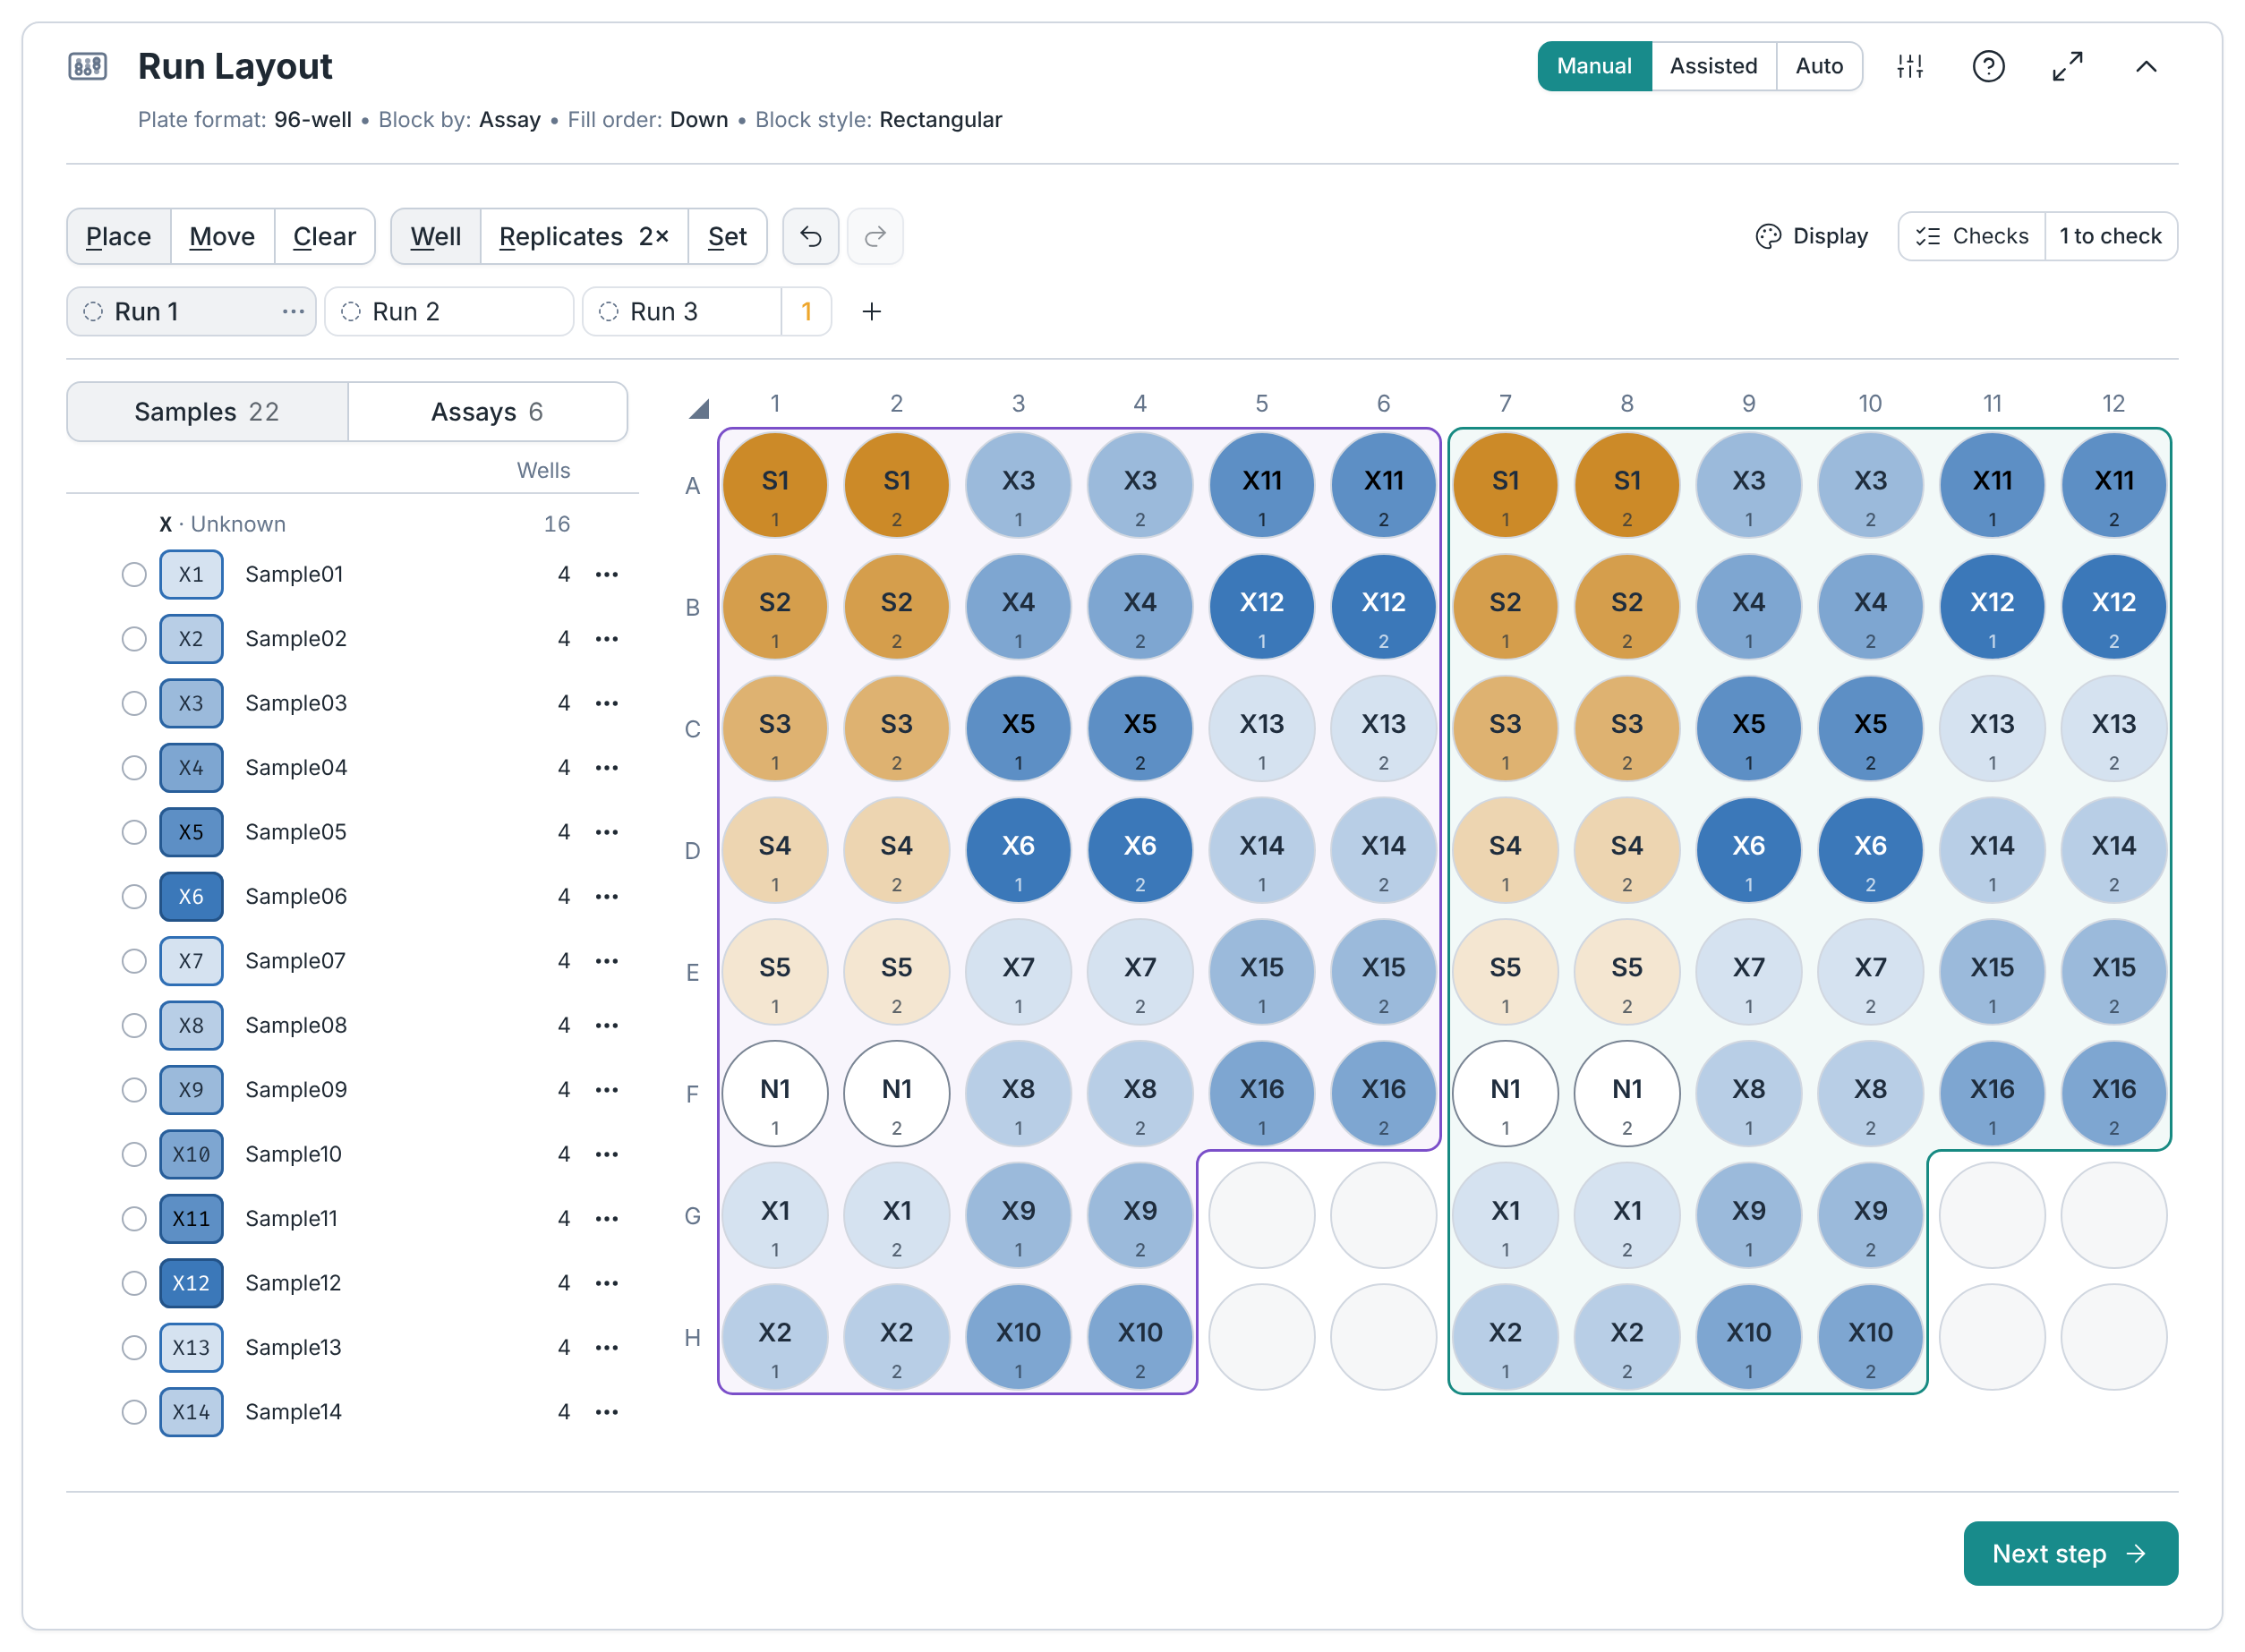
Clarida places the samples and assays on the plate by your rules, with replicates side by side for a multichannel pipette. Left on automatic, it picks each rule from the experiment and shows the reason under it. More reactions than fit go onto further plates, whole blocks kept together if you want.
In manual mode, the plate opens in Edit: lay out each run as in the free Plate editor, with undo and redo. Checks flag wells with only a sample or only an assay, and assays without a negative control.
- Mode: automatic, assisted or manual
- Plates: 96 or 384 wells, as many as the experiment needs
- Block by: assay or sample
- Fill order: down or across
- Block style: rectangular or continuous
- Replicates: how many per reaction; adjacent, after all others or stacked
- 384 wells: the quadrant pattern for multichannel pipettes
Read the method: Plate layout generation
06In the app: Cycling Protocol
The cycling program, from your library
Take a protocol from this experiment, your library or Clarida’s. Or build one from holds, reads, repeats and a melt curve, in the order you drag them, and save it to your library for the next one.
- Mode: automatic, assisted or manual
- Steps: hold, hold and read, repeat, melt curve
Which parts you see
Each kind of experiment opens with the parts it uses.
| Gene expression, reference genes, detection | Sample Prep, Assay Prep, Mix, Run Layout and Cycling Protocol |
|---|---|
| Genotyping | The same, with Marker Setup after Assay Prep |
| Plate homogeneity | One short form instead: one sample, one assay, the mix, the protocol, the plate and how many wells |
What Design doesn’t do
| Other plate formats | 96 and 384 wells only; runs on other plates still import and analyze |
|---|---|
| The cycling program as a file | Start run shows the program step by step; you enter it in the cycler’s software yourself |
Frequently asked questions
Can you send the plate layout to your cycler?
Yes: Instrument file in Start run downloads each run as a QuantStudio or CFX setup file.
Does Clarida add the controls?
No, but it warns when one is missing. They are samples and assays with a control type, so they are placed by the same rules and checked later against the Cq range you set.