The rules that hold
- Clarida does the arithmetic; you tick off what is done. Every volume comes from the plate you designed, surplus included.
- The volumes follow the plate until the runs are ready. Once a run is marked ready, its layout and mixes lock, so what you pipetted stays on record.
- A bench note is shown, never applied. A note on a well appears beside it in Analyze; only you exclude a well.
In this step
01In the app: Collect Material
What to take out, and how much
Clarida lists every sample, assay and reagent the plate needs, with the volume to collect: what one well takes, times the wells, plus the surplus. Mark each sample and assay as you go, with a note where something is short or wrong.
- Lists: samples, assays and reagents, each with its volume in µL
- Mark samples and assays as: OK, note, missing or error
- Surplus: set per mix in Design, 10% unless you change it
02In the app: Prepare Mixes
Every mix with its recipe
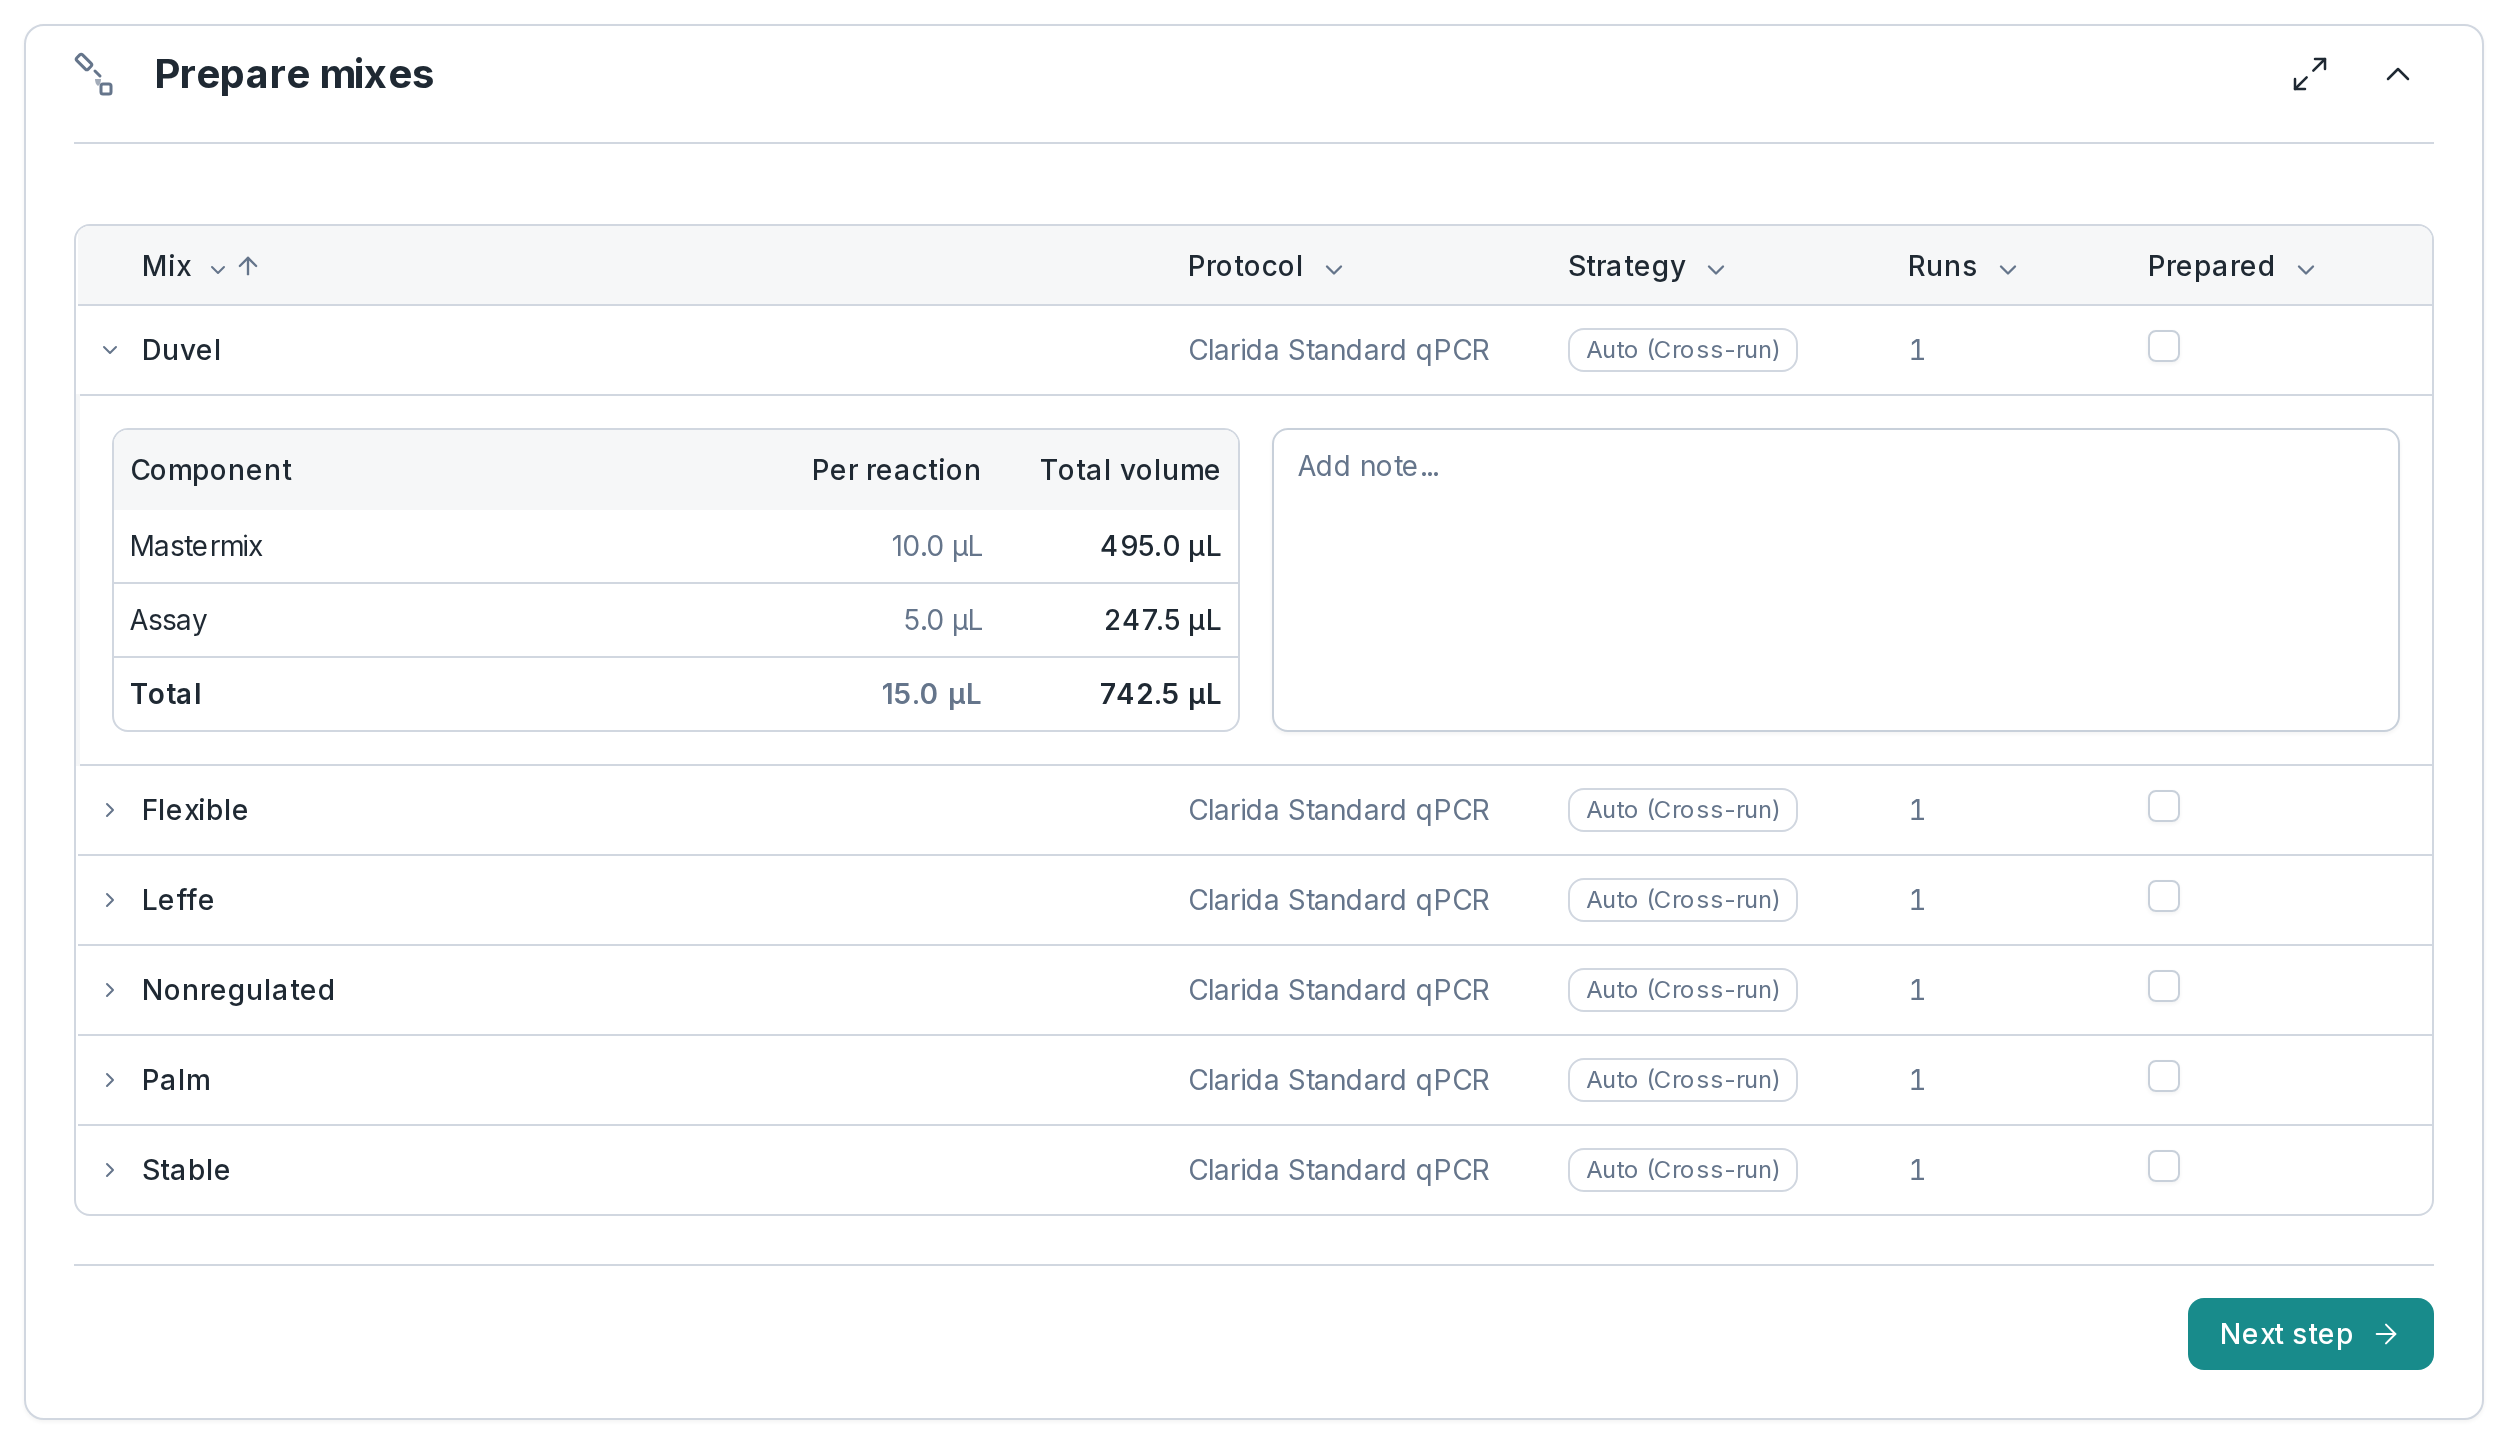
Each mix comes with its recipe: every component per reaction and in total, surplus included. When you arrive, the first mix still to make is open; tick each one off once it is made.
- Per mix: the components per reaction, the total to pipette, its strategy from Design, and a note
03In the app: Fill Plate
Fill the plate one stage at a time
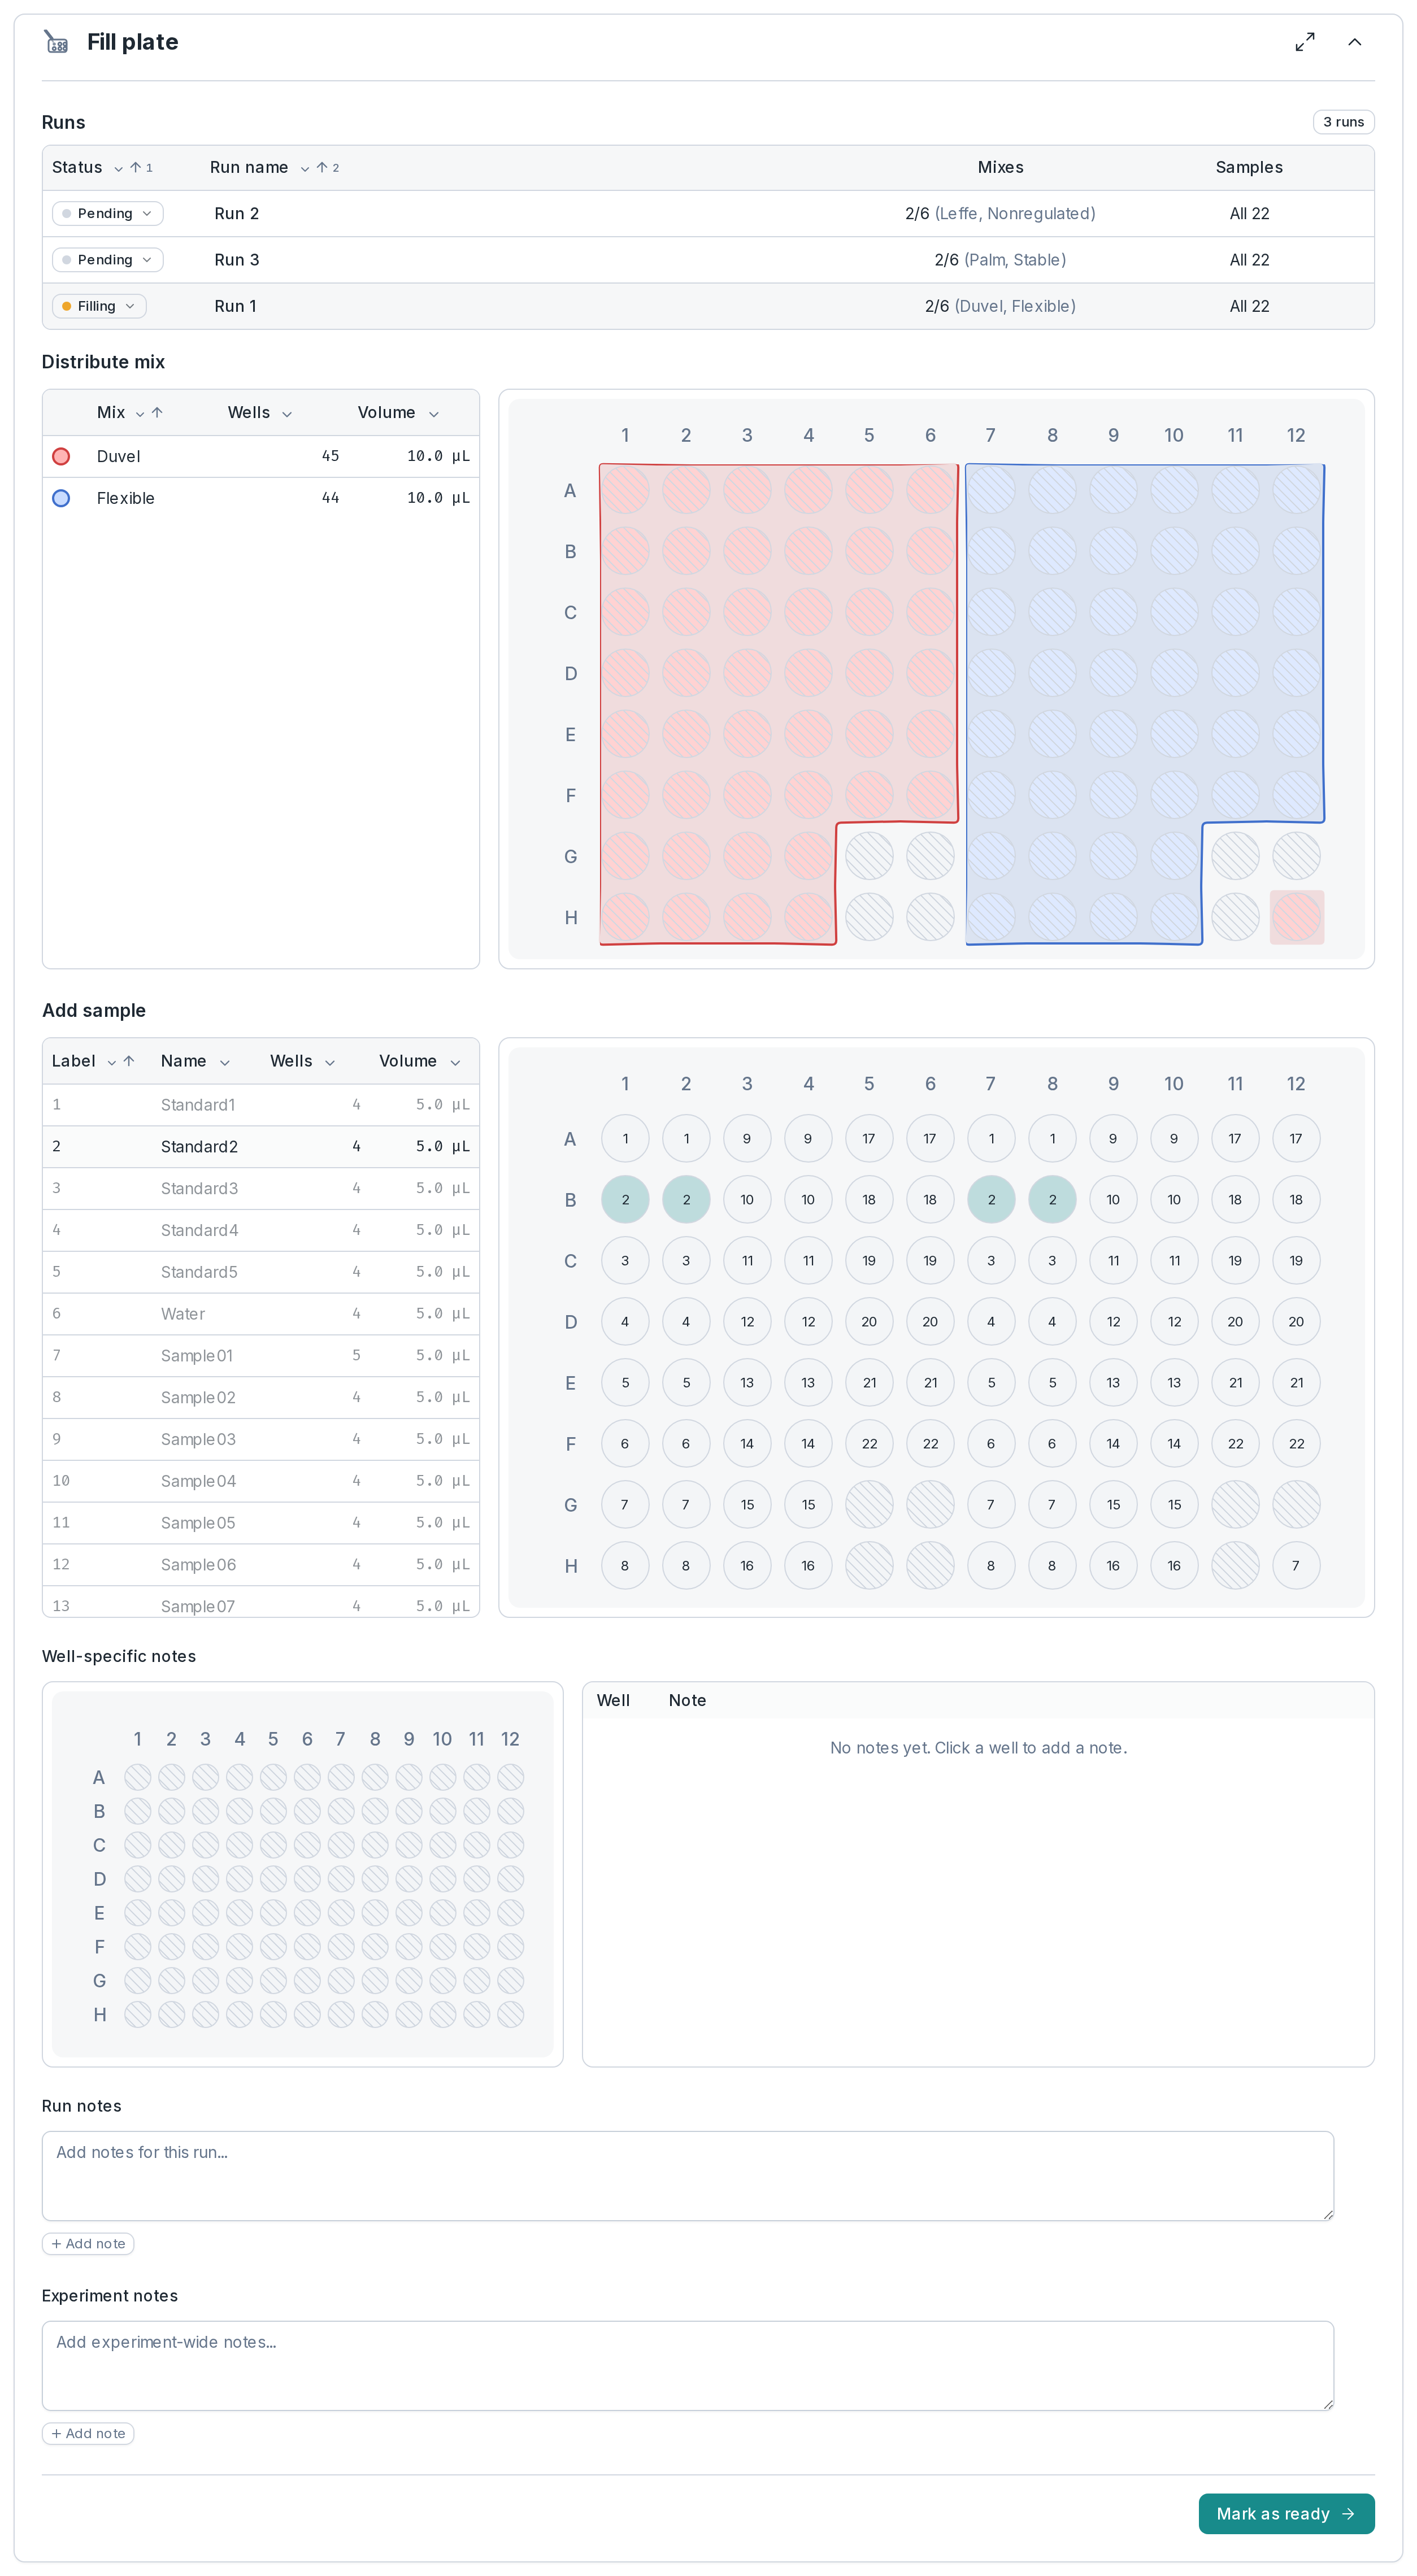
The pipetting guide shows the plate as you fill it, in the stages your mix calls for: first the mix into its wells, then the assay, the sample or both. Point at a row with the mouse and its wells light up. A well that needs a remark gets a note on the well itself.
- Notes: on a well, on the run, or on the whole experiment
- Several runs: fill one plate after the other, each marked ready when it is done
04In the app: Start Run
The right cycler, and the program it runs
Pick the cycler the plate goes into, from its maker and model down to your lab’s own; the list offers only the ones that take this format. Clarida shows the program with its annealing temperature, the number of cycles and an estimate of the run time, and records that the run has started.
- Instrument: maker, model and your own, saved per run; add one that is missing
- Program: the protocol from Design, step by step, with its estimated duration
- Instrument file: the run as the plate setup file your cycler imports, for the cyclers the Plate editor writes, checked before you download it
05In the app: Execute › Sessions
Several plates, in sessions
A large experiment can run on several days: switch Execute to multi-session, and each one shows only the material, mixes and plates for its runs. A shared material says which other session needs it too.
- Execution mode: single or multi-session
What Execute doesn’t do
| The cycler | Clarida records the run; you start it on the instrument as always |
|---|---|
| Paper and tablets | No print view and no tablet layout |
| Timers | None for incubations or the run; the run time shown is an estimate |
Frequently asked questions
Is there a master mix calculator?
Yes, built in: each mix’s recipe is worked out from the plate, per reaction and in total, surplus included.
Can you export the bench work to your lab notebook?
Yes. The Excel notebook export holds the material lists with their flags and notes, the mixes and, per run, the pipetting steps, instrument and cycling protocol, with your well notes and experiment notes.